Showing posts with label HamyV. Show all posts

Wednesday, March 20, 2013

Hand Burst


Last night, we stained.

Sunday, March 17, 2013

HamyV update- Veneer we go again

I took the dive about a month ago and started back in on the Hamy V project.  We'd been on hold for about a year as I waited for some kind of inspiration to deal with the veneer that went on poorly.  Inspiration never came, so I was forced to confront the fact that I'd made a mistake and I needed to take a risk to repair it.

Out came the heat-gun, a putty knife, and cautious use of the orbital sander to clear away a side of veneer which came out wavy and buckled.  Crap.

I started again, but this time I put TWO bags of sand on the top to keep it flattened.
 

Come the morning, this round of veneer had buckled as well.

Inspiration decided to finally come around and pay me a visit, asking, "Why are you using sand bags when you have many, many clamps and plenty of wood with which to press this all together?"

I replied in a shy manner, "Because I'm stupid?"

"Exactly.  Now back to your wife's pink heat gun and the putty knife and let's do it right this time."


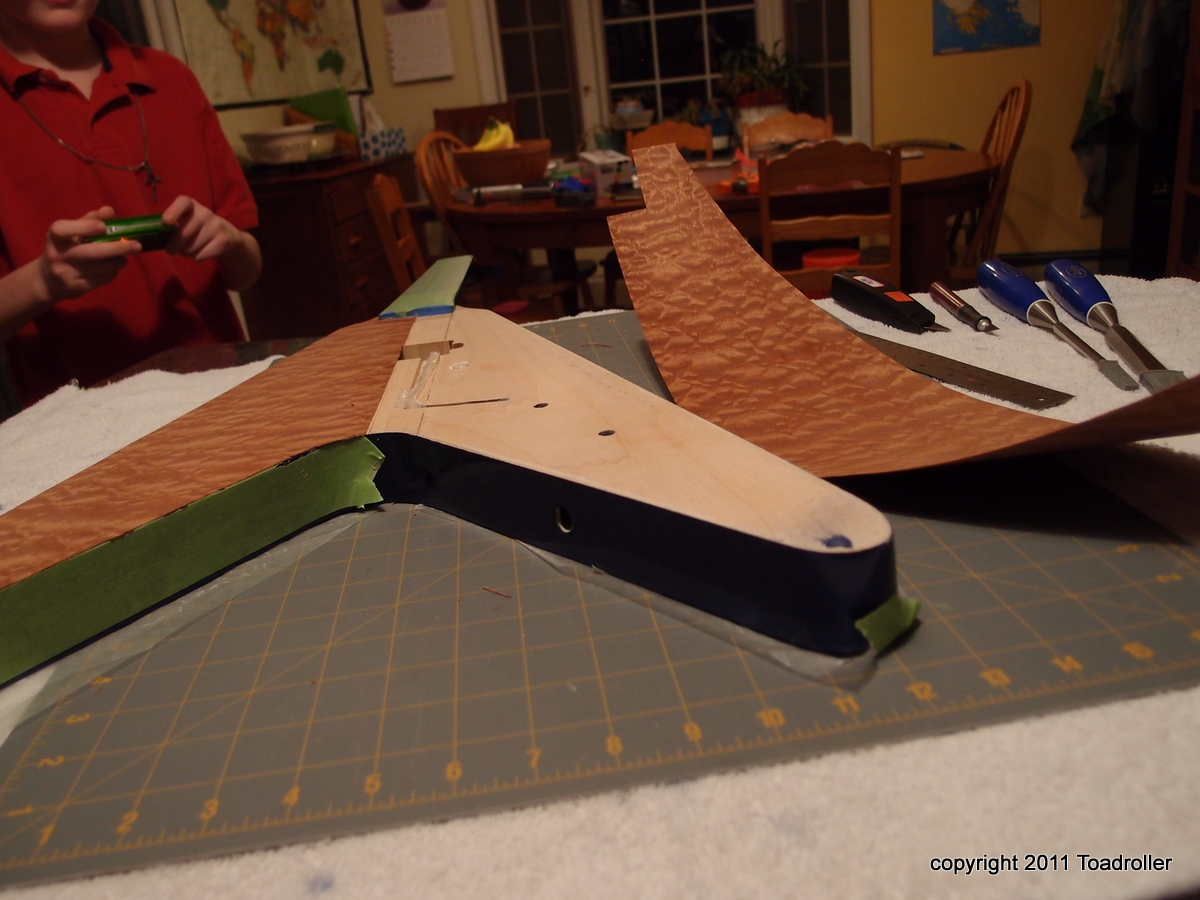
This weekend, I laid out another sheet of my dwindling supply of sapele veneer and clamped the mother down.


 Lots of clamps.  And a wee crack at the end.  That's life.

I put some small wood filling in minor cracks and openings. 


Inspiration piped up to advise me I could have masked around those areas and reduced the amount of sanding I'd had to do.  I smacked Inspiration upside the head and asked it if it had any more brilliant insights.
"Just one," it said, "you could have tinted the wood filling, combining the grain-filling and crack filling into one process."

Inspiration then ducked.


I mixed up wood filling with some red and black and magenta paint, and a little water, then scraped it into the grain on the veneer.  A few hours later, I sanded the excess off with 220 and a sanding block.

 What we have now is a well sanded, grain-filled veneer top on the body and the peg head.  It is ready for staining (we're going to attempt a ragged on nuclear orange with a bit of a burst to the edges) and follow up spraying of many coats of glossy poly to seal it all in and make it shiny.

From there, a small matter of drilling out the various holes which lie beneath the veneer, fretting, nut placing, wiring and, um, rocking out.

Sunday, March 11, 2012

Vaneerifying

Tops!

Cut veneer close. Glue it on. Clamp it with a 50 lb bag of sand.  Wait overnight.  Trim it closer.


But why did you paint before gluing on the veneer?  Impatience and overcoming inertia.  And it really doesn't affect the results.


Beware the liquid gluten.


"Just a trim today, sir?"

It won't float away


Interesting clamp.
Yeah!

This has turned out alright

Repeat for the other side.

Bookmatched- and it turned out to be pretty good.


hHeavy
Notice the correct amount of dry vermouth.
Have MartiniThe final results tomorrow.

Sunday, February 26, 2012

And in her eyes two sapphires blue

That quote from Wang Chung's 80s hit Dance Hall Days is the only way I can describe the color of project Hamy V.

It had been a week of drying, and I could no longer smell paint when I sniffed the guitar, so over the weekend we took the plunge and started sanding.

We started off gingerly wet sanding with 2000 grit, afraid to sand through the clear coat and into the paint or beyond.  By the end though, I'd developed enough feel and trust that I was giving it some pretty serious elbow grease with a progression of 1000, 1500, and finally 2000 grit to get it as smooth as I could.  Here are the results:


Basically, I did what you do if you spend a late summer afternoon really giving your car a solid detailing. 

First, we clean the paint with a cutting compound, also referred to as a rubbing compound. This buffing-out cut through the haze left by the sanding and revealed a thrilling depth and sparkle.  Most of the videos I've seen of this step had people using orbital sanders and buffers.  I just did it by hand.  I trust my hands more than a high speed device for my first effort. 
Looking very promising


From there, I used a swirl remover/polish and finished off with some wax.  The results are fantastic! 

The neck is unbelievable- deep, smooth color.  My car is the same color and doesn't look this good.

Coming atcha! Look at the reflection on the body.

I learned quite a bit.  You can sand through.  Any imperfection in the surface before you paint will be there after you paint.  Fillers such as wood fillers, bondo, and grain fillers (sometimes epoxy) take care of this. No I know.  I developed a bit of touch and trust in sanding paint. "Rattle-can" results can be stunning.

I just love the neck on this thing.


We exercised patience, research, and some risks, and boy were we rewarded.  Now it's time to start on the front, which is going to be a quilted top lacewood kind of veneer.  It should look fantastic.

Thursday, February 23, 2012

Like waiting for paint to dry

Because, well, we're waiting for the paint to dry.

Monday, February 20, 2012

Luster

Hamy V update. 

Shot another four very thin coats of color on top of the sanded undercoats, and then about five thin coats of clear. 

There are many theories about how long to wait between the color coat and the clear coat, usually discussed by the obsessive-compulsive-crowd in terms of weeks.  Well, the cans I had recommended waiting thirty minutes.  So I'm sure we blew their minds by waiting forty-five.

Blue.

Shiny.
The sunlight shows the depth of the color.

Available at your local VIP Parts.

For fine-buffing of the clear coat


We'll wait a while (days? weeks?) for the clear-coat to really dry.  One rule of thumb I've read said that it's dry when it no longer smells like paint.  Makes sense to me. 

We'll wet-sand it with the 2000 grit shown above, then use the car-waxing buffer to bring the shine back.  That should remove the orange-peel like effect and leave a very smooth finish.  I hope.

I've got a piece of maple that I painted and clear-coated alongside the guitar.  We'll use it to experiment with the sanding and buffing.

Saturday, February 18, 2012

The finer things

Project Hamy V continues. 

The pearl blue paint has dried over the last few days, and this morning I took some 2000 grit wet-sanding to the splatter on the neck.


One small test led to another larger test and more confidence.  I ended up wet sanding the whole thing, lightly, with progressive 600 to 1500 to 2000, smoothing out all the rough spots.  You can see the dull areas where the sanding had its greatest effect.  Now the surface is, as my friend Bill Huber used to say, "smooth as a baby's bottom," although Bill was referring to his Olde English 300 quart bottle of beer, which he also claimed to taste "like mother's milk." You and I know Olde English 300 is nothing of the sort.

Next up, we'll spray a few more coats of color to get the sparkle back in the finish, and then cover it all with many layers of clear-coat. I figure all this sanding is good practice for when we ultimately have to sand, buff, and polish the clear-coat for the final product. 

We also have to get the veneer glued to the top and trim it close.  My experiments indicate that process will be a pain much like the morning after a little too much Olde English 300.